Alright so in the last part we got a ship to the screen and that is about it, nothing really exciting. Let’s change that! Let’s get our player moving, and get him shooting!
First lets update our player object to account for a few more variables.
Game.player = {
	x: 0,
	y: 0,
	w: 64,
	h: 64,
	speed: 10,
	left: false,
	right: false,
	up: false,
	down: false,
    ...
}
Let’s add a speed variable, and some boolean variables to check what keys are being pressed. We will also move our first call to requestAnimationFrame(Game.update); into a new init function so that we can set up some event listening.
Game.init = function() {
	window.addEventListener('keydown',Game.keys.keyDown);
	window.addEventListener('keyup',Game.keys.keyUp);
	requestAnimationFrame(Game.update);
}
As you can see we moved our update call into the init function, that way at the bottom of our game we just call Game.init(); to get everything going.
Now, lets set up a the Game.keys object, this will have 3 methods in it keyUp, keyDown, and checkKeys.
Lets take a look at what these look like.
Game.keys = {
	keyDown: function(e) {
		//37 is left
		//38 is up
		//39 is right
		//40 is Down
		if(e.keyCode === 37){
			Game.player.left = true;
			Game.player.x -= Game.player.speed;
		}
		if(e.keyCode === 38){
			Game.player.up = true;
			Game.player.y -= Game.player.speed;
		}
		if(e.keyCode === 39){
			Game.player.right = true;
			Game.player.x += Game.player.speed;
		}
		if(e.keyCode === 40){
			Game.player.down = true;
			Game.player.y += Game.player.speed;
		}
	},
	keyUp: function(e){
		if(e.keyCode === 37){
			Game.player.left = false;
		}
		if(e.keyCode === 38){
			Game.player.up = false;
		}
		if(e.keyCode === 39){
			Game.player.right = false;
		}
		if(e.keyCode === 40){
			Game.player.down = false;
		}
	},
	checkKeys: function(){
		if(Game.player.left === true){
			Game.player.x -= Game.player.speed;
		}
		if(Game.player.up === true){
			Game.player.y -= Game.player.speed;
		}
		if(Game.player.right === true){
			Game.player.x += Game.player.speed;
		}
		if(Game.player.down === true){
			Game.player.y += Game.player.speed;
		}
	}
}
The keyUp and keyDown methods are pretty simple. We set up event listeners for both of these, one for the keydown event and keyup event. The methods take the the event and check which key was pressed. In the case of keyDown we will set a boolean value to true for the direction, on the keyup event we set that value to false. Why set a boolean value?
The third method in the Game.keys object is checkKeys. We will run this every frame in our main loop. If the player has a keydown, this method will make the player move in the current direction that is set to true.
The main loop should look something like this now:
Game.update = function() {
	//Lets paint the background
	//Set the fill style to be one of those not quite black but cool colors
	Game.ctx.fillStyle = '#273636';
	//Paint the background
	Game.ctx.fillRect(0,0,Game.W,Game.H);
	//Paint the player
	Game.player.paint();
	//Check is player keys
	Game.keys.checkKeys();

    //Call loop again
	requestAnimationFrame(Game.update);
};
Now if you start up your game up and move your player around, you will get a nice smooth moving space ship! Not to bad eh!
Lets get this player firing some bullets! To do this we will create an empty array to store the players bullets, we will also create a Bullet object. Lets add this right after the definition of Game.player. It will have a few methods, a render and update.
//Empty array of bullets
Game.player.bullets = [];
//Bullet constructor
Game.Bullet = function(x,y){
	this.x = x;
	this.y = y;
	this.render = function() {
    ...
 	};
	this.update = function() {
    ...
	};
};
Now each instance of a Game.Bullet will start at the x y we pass it, which will ultimately be the players position. Now lets flesh out the render method. We just need to set a colour for the bullet and draw the shape.
this.render = function(){
	Game.ctx.fillStyle = '#ffffff';
	Game.ctx.fillRect(this.x,this.y, 10, 4);
};
Lets also finish the update method. This one is pretty simple. we just need to update the position of the bullet.
this.update = function(){
     this.x += 20;
};
Ok, so we got our player moving, and some logic for bullets…so lets get them going! Lets go back to our keys object and add another check in the keyDown method to check for the space bar (key code 32). When the key is pressed we will make a new Bullet and add it to our players bullet array. We pass the current position of the player to the new Bullet, so that they will appear follow the player.
if(e.keyCode === 32) {
     Game.player.bullets.push(new Game.Bullet(Game.player.x,Game.player.y));
}
We are almost there, the last thing we need to do to is actually draw them to the screen. We will make a Game.player.handleBullets in it will have logic to render all the bullets, and update all the bullets. Lets flesh it out and then break them down.
Game.player.handleBullets = {
	renderBullets: function() {
		for(var i = 0; i < Game.player.bullets.length; i++){
			Game.player.bullets[i].render();
		}
	},
	updateBullets: function() {
		for(var i = 0; i < Game.player.bullets.length; i++){
			Game.player.bullets[i].update();
		}
	}
};
Each method is pretty straight forward, we loop through the bullets array and perform 2 actions. We render them with renderBullets method and then update all the positions with the updateBullets methods. The last step is to call these methods! Going back into our Game.update and just after the Game.keys.checkKeys.
Game.keys.checkKeys();

Game.player.handleBullets.renderBullets();
Game.player.handleBullets.updateBullets();

requestAnimationFrame(Game.update);
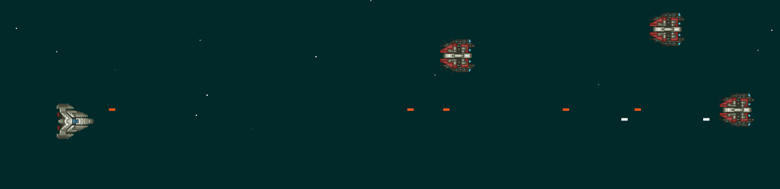
Load up your game, and BAM! Pressing space will fire some bullets, you will notice that they are not quite positioned properly. If you play around with the initial position of the x y of the bullet you can get it to be in the center of the ship.
Game.Bullet = function(x,y){
	this.x = x + 60;
	this.y = y + 29;
     ...
};
And there you have it. Ship moving, bullets(or missiles if you want!) firing. Let's stop there for now, in the next part we will finish it off. We will create an enemy, and make some stars! Remember all the files for this can be found on GitHub. Look for part 3 soon!
Pingback: Let’s Build a Game! Part 3 - Ryan Christiani | Front-End Dev()